 They look much better after the flux is soaked off.
 Joint done. I'm not the best brazer, but I'm getting better and I'm confident in their strength.
Crappy picture of my tacking sequence. Obtuse angle, acute angle, left side, right side.
Then I do a "tinning pass" to make sure the brass gets good penetration and builds the internal fillet. If I don't fully consume the tacks in this pass, I get voids.
 Fluxed and ready for the torch. Notice the heat sink/weight used to keep everything where It should be.
 Then I hit it again with the cartridge roll. Then a quick wipe of alcohol before the flux goes on. Dawn works so well at removing oils, that the tubes corrode as they dry.
 Here is the over-engineered tool I made to clean the inside of the tubes. Just a piece of brazing rod bent around half a sponge. Worked quite well combined with Dawn dish washing liquid. If you don't wash all the way down the tube, you get a cool fireball as the oil burns off.
 Using cartridge rolls on a die grinder to remove the mill scale from the ID of the downtube.
 Good enough for me
 Woops. I goofed on the drawing and didn't realize it until after I had cut the HT miter on the DT. I'm off by about .75 deg. A little hand work required to get it where it needs to be.
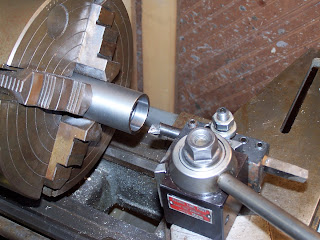
 Turning the headtubes. This started as a piece of 1.625 x .156 4130. The outside was turned to 1.600 for cleanup and the inside was bored for a headset plus .010. The center was relieved for weight. Wall thickness was left at .060.
The logic on this was to provide a nice large tube to attach the 1.5" DT. This made the fillet braze much easier. The integral "reinforcing rings" left on the headtube meant I could braze closer to the edge with less distortion and fear of overheating. It worked well. Heat control was much easier than with normal headtube stock. Since my headtube is on 4.25 long, I only left 10mm below the DT and 7mm above.


No comments:
Post a Comment